安装 Nginx
- 执行以下命令,在
/etc/yum.repos.d/ 下创建 nginx.repo 文件。
1
| vi /etc/yum.repos.d/nginx.repo
|
- 按 i 切换至编辑模式,写入以下内容。
1
2
3
4
5
| [nginx]
name = nginx repo
baseurl = https://nginx.org/packages/mainline/centos/7/$basearch/
gpgcheck = 0
enabled = 1
|
按 Esc,输入 :wq,保存文件并返回。
执行以下命令,安装 nginx。
- 执行以下命令,打开
nginx.conf 文件。
1
| vim /etc/nginx/nginx.conf
|
按 i 切换至编辑模式,编辑 nginx.conf 文件。
找到 server{...},并将 server 大括号中相应的配置信息替换为如下内容。用于取消对 IPv6 地址的监听,同时配置 Nginx,实现与 PHP 的联动。
说明:可使用 Ctrl+F 向下翻页、Ctrl+B向上翻页查看文件。
1
2
3
4
5
6
7
8
9
10
11
12
13
14
15
16
17
18
19
20
21
22
23
24
25
26
| server {
listen 80;
root /usr/share/nginx/html;
server_name localhost;
location / {
index index.php index.html index.htm;
}
error_page 500 502 503 504 /50x.html;
location = /50x.html {
root /usr/share/nginx/html;
}
location ~ .php$ {
fastcgi_pass 127.0.0.1:9000;
fastcgi_index index.php;
fastcgi_param SCRIPT_FILENAME $document_root$fastcgi_script_name;
include fastcgi_params;
}
}
|
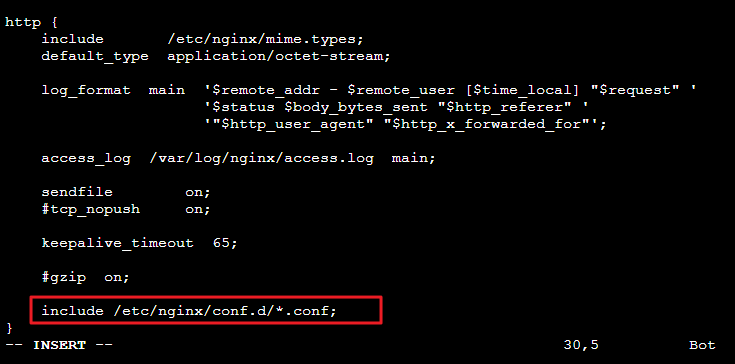
若 nginx.conf 文件中未找到 server{...} ,请在 include /etc/nginx/conf.d/*conf; 上方添加以上的 server{...} 配置内容。如下图所示:
按 Esc,输入 :wq,保存文件并返回。
执行以下命令启动 Nginx。
- 执行以下命令,设置 Nginx 为开机自启动。
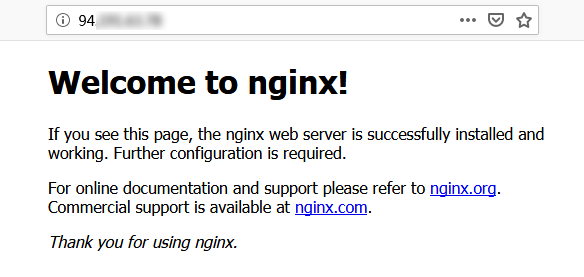
- 在本地浏览器中访问以下地址,查看 Nginx 服务是否正常运行。
显示如下,则说明 Nginx 安装配置成功。
安装数据库
- 执行以下命令,查看系统中是否已安装 MariaDB。
1
| rpm -qa | grep -i mariadb
|
- 执行以下命令,在
/etc/yum.repos.d/ 下创建 MariaDB.repo 文件。
1
| vi /etc/yum.repos.d/MariaDB.repo
|
按 i 切换至编辑模式,写入以下内容,添加 MariaDB 软件库。
说明:不同操作系统的 MariaDB 软件库不同,可前往 MariaDB 官网 获取其他版本操作系统的 MariaDB 软件库安装信息。
1
2
3
4
5
6
7
8
| [mariadb-main]
name = MariaDB Server
baseurl = https://mirrors.ustc.edu.cn/mariadb/yum/10.4/centos7-amd64
gpgkey = https://mirrors.ustc.edu.cn/mariadb/yum/RPM-GPG-KEY-MariaDB
gpgcheck = 1
enabled = 1
|
这里使用了国内的镜像,下载速度快得多
按 Esc,输入 :wq,保存文件并返回。
执行以下命令,安装 MariaDB。
1
| yum -y install MariaDB-client MariaDB-server
|
- 执行以下命令,启动 MariaDB 服务。
- 执行以下命令,设置 MariaDB 为开机自启动。
1
| systemctl enable mariadb
|
- 执行以下命令,验证 MariaDB 是否安装成功。
显示结果如下,则成功安装。

- 执行以下命令,退出 MariaDB。
安装配置PHP
- 依次执行以下命令,更新 yum 中 PHP 的软件源。
1
| rpm -Uvh https://mirrors.cloud.tencent.com/epel/epel-release-latest-7.noarch.rpm
|
1
| rpm -Uvh https://mirror.webtatic.com/yum/el7/webtatic-release.rpm
|
- 执行以下命令,安装 PHP 7.2 所需要的包。
1
| yum -y install mod_php72w.x86_64 php72w-cli.x86_64 php72w-common.x86_64 php72w-mysqlnd php72w-fpm.x86_64
|
- 执行以下命令,启动 PHP-FPM 服务。
- 执行以下命令,设置 PHP-FPM 服务为开机自启动。
1
| systemctl enable php-fpm
|
验证环境配置
当您完成环境配置后,可以通过以下验证 LNMP 环境是否搭建成功。
- 执行以下命令,创建测试文件。
1
| echo "<?php phpinfo(); ?>" >> /usr/share/nginx/html/index.php
|
- 执行以下命令,重启 Nginx 服务。
- 在本地浏览器中访问如下地址,查看环境配置是否成功。
参考资料:
